Surface analysis in ArcGIS Pro is a powerful method for understanding terrain, landforms, and spatial patterns using digital elevation models (DEMs). It is widely used in geology, hydrology, urban planning, and environmental management. This post explores key surface analysis techniques, their applications, and how to perform them in ArcGIS Pro.
To perform surface analysis in ArcGIS Pro, you’ll typically start by importing your elevation data (DEM), then use Spatial Analyst tools to derive information ultimately allowing you to visualize and analyze the terrain.
KEY SURFACE ANALYSIS TECHNIQUES IN ARCGIS PRO
Data Preparation & Import:
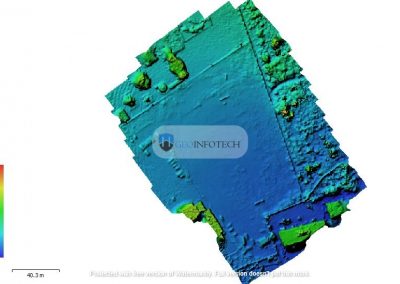
- Acquire Elevation Data: Obtain a raster dataset representing the terrain, such as a Digital Elevation Model (DEM).
- Import Data: Add the elevation raster to your ArcGIS Pro project.
- Define Coordinate System: Ensure your data has the correct spatial reference.
Surface Analysis Tools
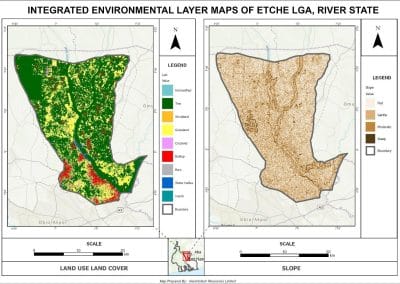
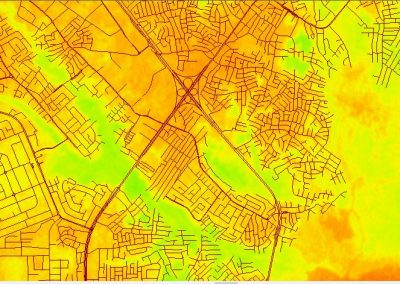
A. SLOPE
Applications:
✅ Identifying areas prone to landslides.
✅ Evaluating terrain suitability for construction or agriculture.
✅ Modeling erosion and runoff potential.
How to Perform in ArcGIS Pro
- Add your DEM
- Open Geoprocessing Pane > Search for Slope
- Select the DEM in the “input raster”.
- Choose Output Measurement (Degrees or Percentage).
- Click Run to generate the slope raster.
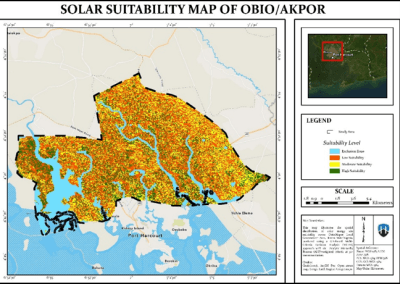
B. ASPECT
Applications:
✅ Analyzing solar exposure for energy projects.
✅ Studying vegetation growth patterns.
✅ Assessing wind exposure for site planning.
How to Perform in ArcGIS Pro:
- Open Geoprocessing Pane > Search for Aspect Tool.
- Select Input DEM.
- Run the tool to generate an aspect map.
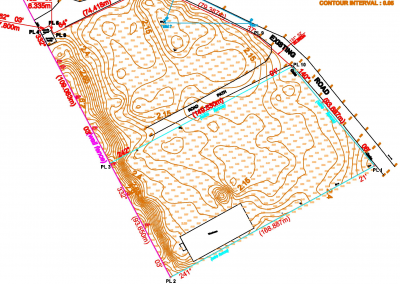
C. CONTOUR
Applications:
✅ Creating topographic maps.
✅ Understanding elevation changes for engineering projects.
✅ Hydrological modeling of watersheds.
Before generating contour, first “Project Raster” using the geoprocessing tool and use DEM as input raster, the run.
Next, generate contour, Use the projected DEM as input raster for contour generation.
How to Perform in ArcGIS Pro:
- Open Geoprocessing Pane > Search for Contour Tool.
- Set the Contour Interval (e.g., 10m or 50m).
- Click Run to generate contour lines.
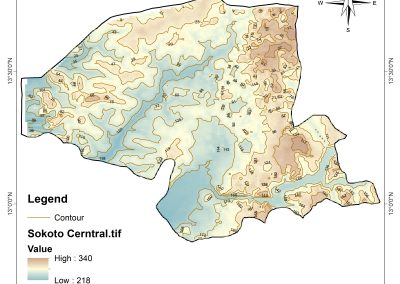
D. HILLSHADE
Applications:
✅ Creating realistic 3D terrain maps.
✅ Improving cartographic representation of landscapes.
✅ Highlighting landforms in archaeological and geological studies.
How to Perform in ArcGIS Pro:
- Open Geoprocessing Pane > Search for Hillshade Tool.
- Set Altitude and Azimuth to define light direction.
- Click Run to generate the shaded relief.
E. VIEWSHED
Applications:
✅ Determining optimal locations for communication towers.
✅ Planning scenic viewpoints and landscape visibility.
✅ Military and security planning for surveillance.
How to Perform in ArcGIS Pro:
- Open Geoprocessing Pane > Search for Viewshed Tool.
- Input Observer Points and DEM.
- Click Run to create a visibility map.
Display results in a map and interprete the result.