Creating a thematic map in ArcGIS Pro involves symbolizing spatial data to highlight specific patterns or themes, such as population density, land use, or climate variations.
Here’s a step-by-step guide to help you design an effective thematic map:
Prepare Your Data: Ensure your dataset is properly formatted and contains the attribute information necessary for your thematic analysis.
Add Data to ArcGIS Pro:
- Open ArcGIS Pro and create a new project or open an existing one.
- Import your spatial data (e.g., shapefiles, geodatabases) into the project.

Open the Map View: Navigate to the ‘Map’ tab to access the map view where you’ll visualize and manipulate your data.
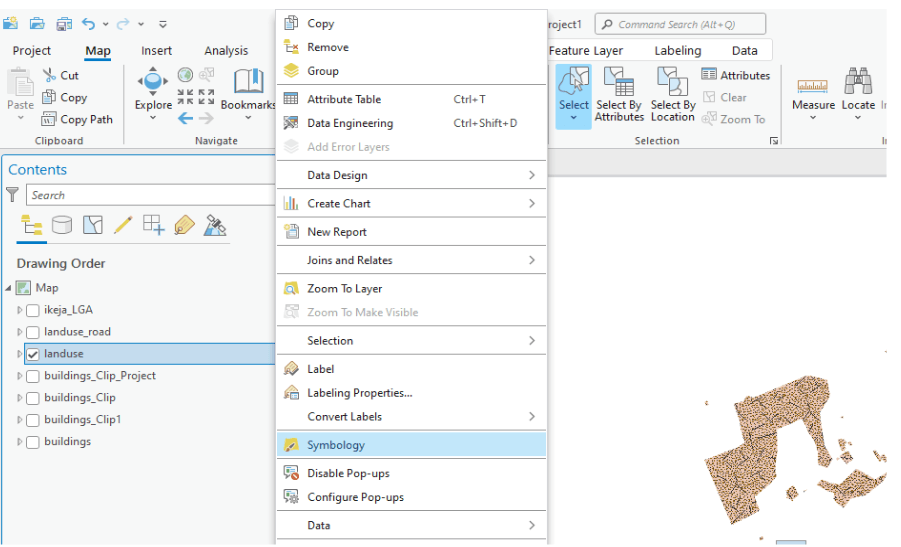
Select the Layer to Symbolize: In the ‘Contents’ pane, right click on the layer and choose symbology.
Access Symbology Settings: Right-click the selected layer and choose ‘Symbology’ from the context menu.
Choose a Symbology Method: In the ‘Symbology’ pane, select an appropriate method based on your data and the theme you want to represent. Common methods include:
- Graduated Colors: Ideal for displaying quantitative data ranges.
- Graduated Symbols: Useful for representing varying magnitudes of data.
- Proportional Symbols: Best for showing exact data values with symbol sizes proportional to the data.
- Dot Density: Effective for visualizing the density of occurrences within a geographic area.
Configure Symbology Parameters:
- Set the field or attribute that contains the data you want to map.
- Define classification methods (e.g., Natural Breaks, Equal Interval) and the number of classes, if applicable.
- Customize color schemes, symbol sizes, and other visual properties to enhance map readability and aesthetics.
Add Supporting Map Elements: Incorporate essential elements such as a legend, scale bar, north arrow, and descriptive labels to provide context.
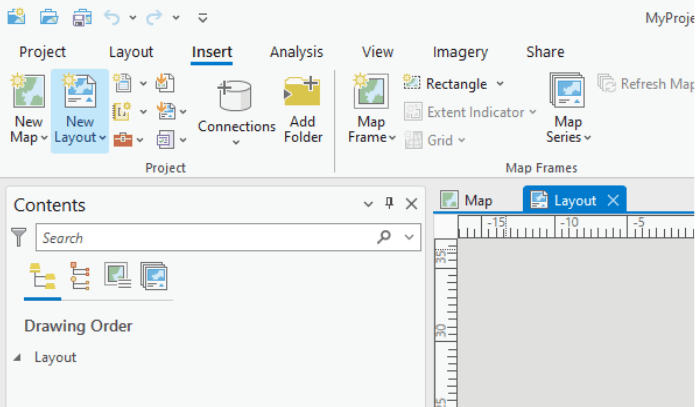
Design the Layout:
- Switch to the ‘Layout’ view to arrange your map and supporting elements cohesively.
- Adjust the placement and size of elements to ensure a balanced and informative presentation.
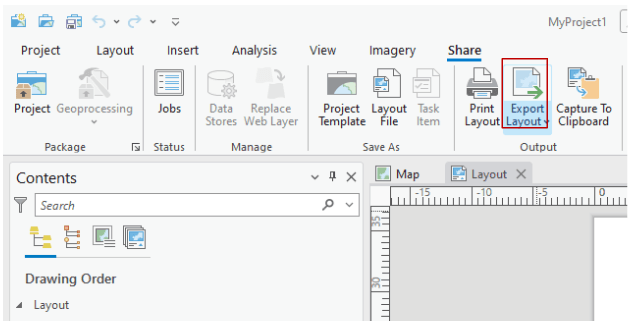
Review and Export:
- Carefully review your map for accuracy, clarity, and visual appeal.
- Once satisfied, export the map in your preferred format (e.g., PDF, image file) for sharing or publication.