Model Builder is a visual programming tool in ArcGIS Pro (and earlier ArcMap) that lets GIS analysts and students create, automate, and share complex geoprocessing workflows without writing code. At its core, Model Builder works like a flowchart: you connect tools (like Clip, Buffer, or Raster Calculator) and datasets into a sequence, showing exactly how data moves from input to output. This visual representation helps clarify analytical processes and ensures they can be repeated or shared easily.

Why use Model Builder?
- Automation: Instead of manually running the same tools each time data changes, you can build a model once and re-run it anytime.
- Reproducibility: Models document your workflow, making your analysis transparent and easier to share or update.
- Flexibility: You can add conditional logic (e.g., if slope > 30°, do this), iterate over datasets, and combine multiple processes.
- No coding needed: Even users with no Python skills can build sophisticated models visually.
How it works
In ArcGIS Pro:
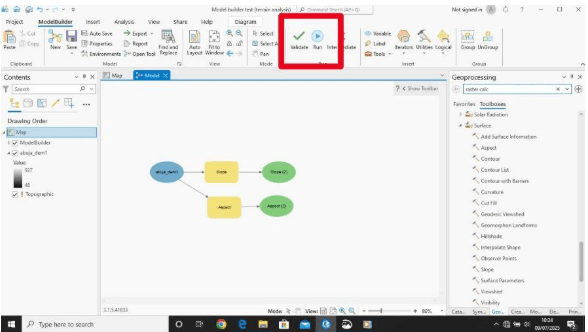
- Go to Analysis > Model Builder to open a new model.
- Drag and drop tools from the toolbox (e.g., Buffer, Clip).
- Add datasets as inputs.
- Connect tools and datasets using arrows.
- Save your model in a toolbox (.tbx) or project geodatabase.
You can also:
Export the model as a Python script to refine it further.
Share it with colleagues to use with their own data.
Model Example
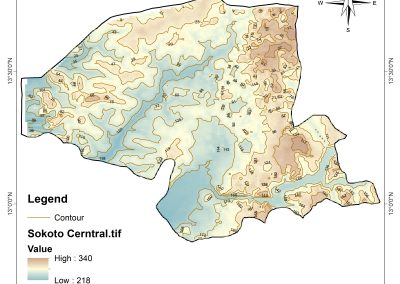
Imagine you’re studying landslide risk in Abuja:
Input: DEM and land cover data.
Tools: Slope, Aspect, Reclassify, Raster Calculator.
Output: A classified risk map.
Using Model Builder, you can chain these tools together. When new DEM data comes in, simply click Run — the entire workflow updates automatically.
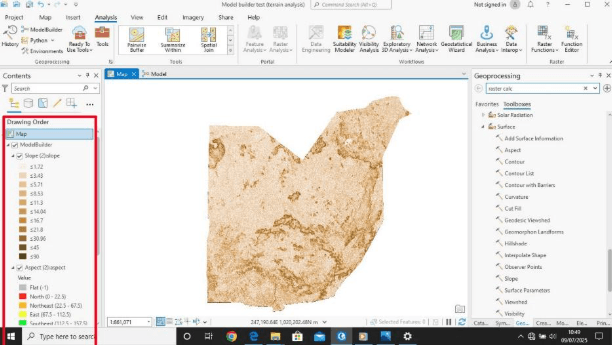
Below is a simple Model design to obtain slope and aspect of Abuja. Input: Abuja state DEM