In our first post, we explored what QGIS is, why it matters, and how organizations use it for spatial analysis and decision-making. Now that you understand the “what” and “why,” this post moves us into the “how.”
Here, you’ll learn how to install QGIS and load your very first spatial dataset laying the groundwork for mapping, analysis, and further exploration.
Before you can analyze or style data in QGIS, you need two things:
- A functioning QGIS installation
- Spatial data loaded into your workspace
Installing QGIS
What You Need:
- A working computer (Windows, macOS, or Linux)
- Internet access
- At least 4 GB of RAM for smooth performance
Installation Steps:
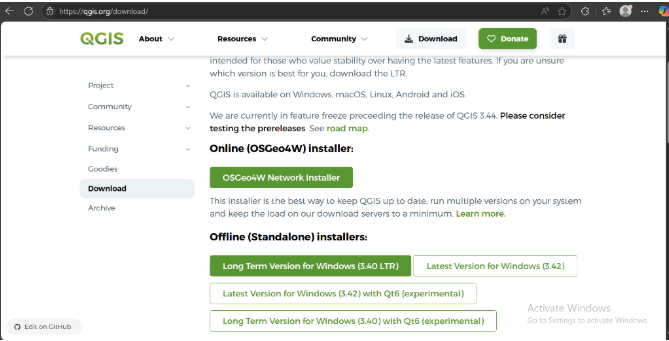
- Go to the official QGIS Download page.
- Select your operating system (e.g., Windows).
- Download the Long Term Release (LTR) version. It’s more stable and recommended for beginners.
- Run the installer file and follow the on-screen instructions.
- After installation, launch QGIS Desktop from your start menu or application folder.
Exploring the QGIS Interface
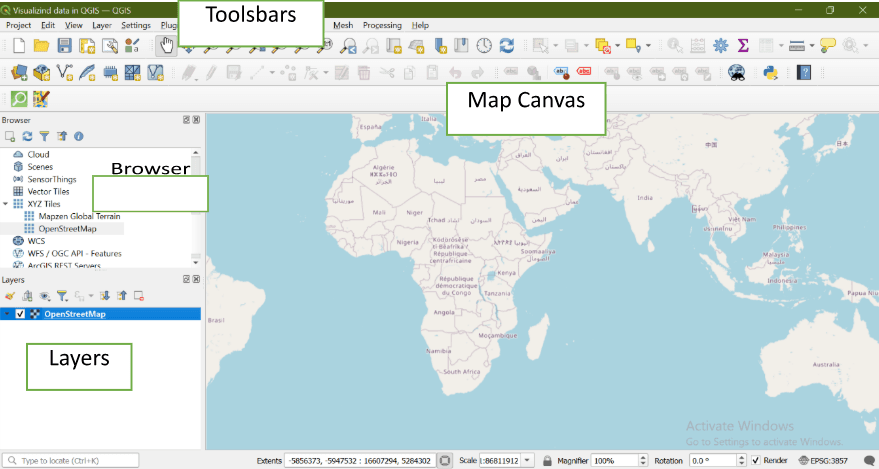
Once you’ve installed and launched QGIS Desktop, the main window will open. This is where all your mapping work happens. Let’s break it down so you understand what you’re seeing:
The QGIS Window Has 3 Main Parts:
- Map Canvas (Center): This is the large white/gray space in the middle. It is where your map will appear once you load a dataset.
- Layers Panel (Usually on the Left): You’ll see a panel called Layers. Once you load a dataset, it will show up here. This panel lets you toggle layers on/off, change the order, or group them.
NB: If it’s not visible, go to View > Panels > Layers.
- Browser Panel (Optional, Often on the Left or Bottom): Shows your file system (like File Explorer). This lets you drag in shapefiles, GeoTIFFs, or other GIS files directly.
NB: If you don’t see it, activate it from View > Panels > Browser.
- Toolbars (Top of the Screen): You’ll see icons like Open Project, Add Layer, Zoom, Pan, and others. These give quick access to common tools.
NB: Hovering your mouse over any icon will show its name.
Loading Your First Dataset (Using the Browser Panel)
The easiest way to load spatial data in QGIS especially for beginners is through the Browser Panel. This lets you quickly navigate to files on your computer and drag them directly into the map.
The Browser Panel in QGIS works like your computer’s File Explorer. It shows your folders and lets you load datasets like shapefiles (.shp), GeoJSONs, rasters, and more simply by dragging and dropping.
However, you might notice something odd the first time: your “Documents” folder (or other common locations) might not be visible by default.
That’s because QGIS doesn’t automatically display all your system folders. But the fix is simple:
- In the Browser Panel, right-click on Favorites.
- Select “Add a Directory…” from the menu.
- Navigate to your Documents folder (e.g., C:\Users\YourName\Documents on Windows).
- Click Select Folder.
Your Documents folder will now show up under “Favorites” and stay visible for future projects making it easier to access commonly used files.
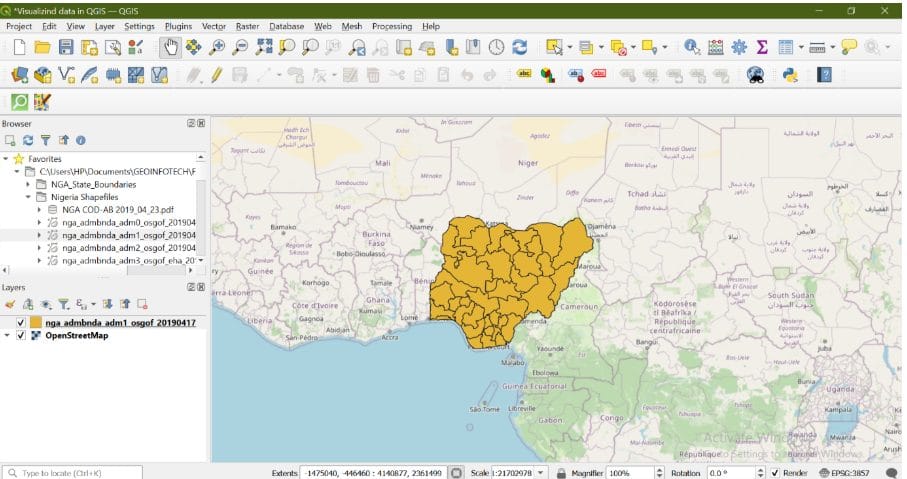
Once your folder is visible, loading a shapefile is as easy as dragging and dropping and the data will instantly appear both in the Map Canvas and in the Layers Panel on the left side of the interface.
Visualizing and Styling Your Data
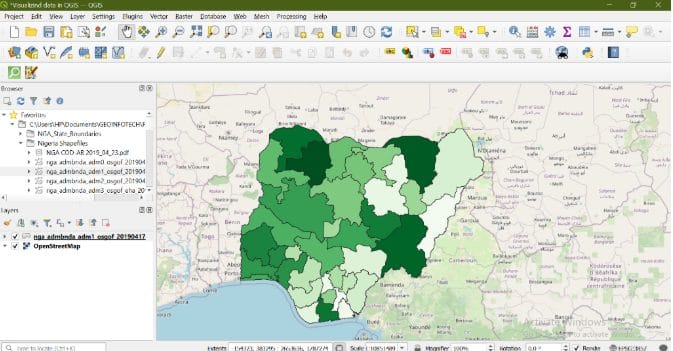
QGIS allows you to quickly style your map so it’s meaningful and clear.
Styling Steps:
- In the Layers Panel, right-click your layer and choose Properties.
- Click the Symbology tab.
- Choose a style:
- Single Symbol for a simple color
- Categorized to color features based on a field (e.g., state names)
- Graduated to use color intensity for numeric values (e.g., population)

4. Click Apply and close the window.
In this part of the series, you learned how to bring your spatial data into QGIS and view it on the map. These first steps may seem simple, but they’re the foundation for everything that follows.
Up next, we’ll dive into working with vector data in QGIS exploring how to inspect, edit, and manage the features behind the map.