In today’s data-driven world, geocoding is an essential skill for any GIS professional. Geocoding converts plain text addresses into geographic coordinates—allowing you to place them on a map, analyze spatial patterns, and make informed decisions.In this guide, we’ll walk through how to geocode addresses using QGIS, one of the most powerful open-source GIS platforms available. By the end, you’ll know how to transform your address data into actionable geospatial insights.
What is Geocoding?
At its core, geocoding is the process of transforming addresses (like “10 Downing Street, London”) into latitude and longitude coordinates (e.g., 51.5034° N, 0.1276° W). Once geocoded, you can visualize the data on a map, perform spatial analysis, or combine it with other datasets for deeper insights.
Why Geocode with QGIS?
While commercial platforms like ArcGIS offer built-in geocoding, QGIS provides a free, flexible alternative especially useful when working with open data sources like OpenStreetMap. Through plugins like MMQGIS, QGIS allows you to batch-geocode address lists without additional licenses or fees.
Step-by-Step Guide: Geocoding in QGIS
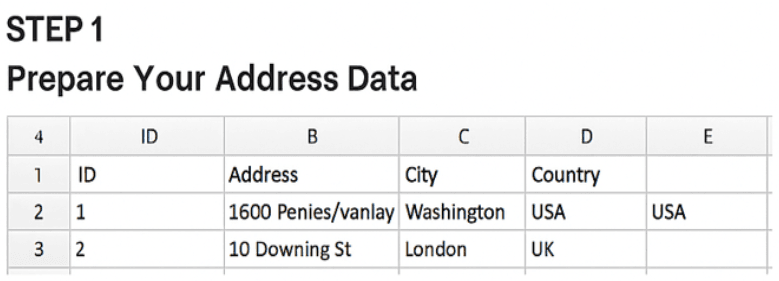
1️. Prepare Your Address Data
Start with a CSV file containing your addresses. At a minimum, include columns like:
- An ID or Name
- Street Address
- City
- State/Province
- Country
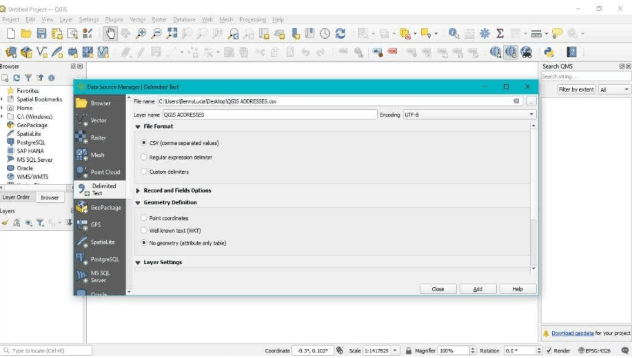
2️. LOAD THE CSV INTO QGIS
- Open QGIS.
- Go to Layer → Add Layer → Add Delimited Text Layer.
- Select your CSV file.
- Ensure the correct delimiter is chosen (usually a comma).
- Set Geometry Definition to “No Geometry (attribute only table)” for now.
Click Add.
Your table will appear in the Layers panel.
3️. INSTALL THE MMQGIS PLUGIN
To enable geocoding, you’ll need the MMQGIS plugin:
- Go to Plugins → Manage and Install Plugins.
- Search for “MMQGIS” and click Install.
Once installed, you’ll see MMQGIS in the top menu.

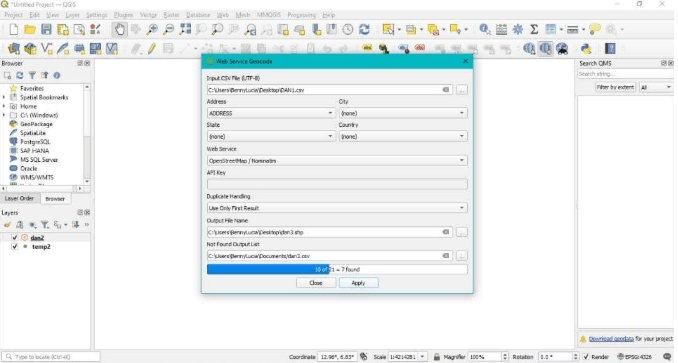
4️. RUN THE GEOCODING TOOL
- Go to MMQGIS → Geocode → Geocode CSV with Web Service.
- In the dialog:
- Select your input CSV file.
- Choose the columns that form the address (e.g., Address + City + Country).
- Choose the web service: typically, OpenStreetMap / Nominatim (free and reliable).
- Define an output file (a shapefile or CSV with coordinates).
Click OK and let QGIS process the geocoding.
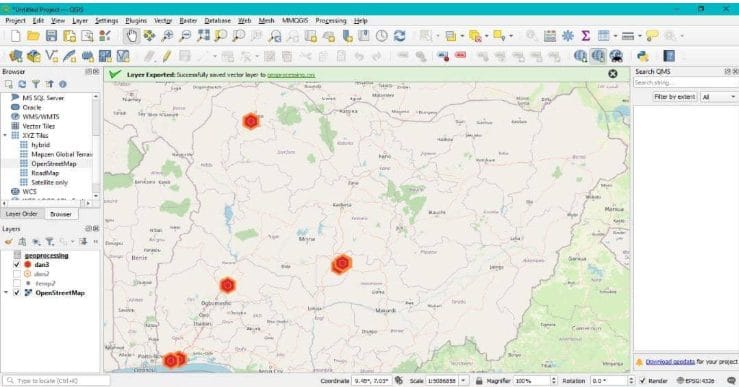
5️. Visualize the Geocoded Points
Once complete:
- A new point layer will appear in the Layers panel.
- Open the Attribute Table to verify your coordinates.
- Style your points using Symbology (e.g., color by category, size by value).
You now have a geospatial dataset ready for mapping and analysis!
6️. Export Your Results
Export your layer in any format supported by QGIS (GeoJSON, Shapefile, CSV with coordinates). This allows you to use the geocoded data in reports, web maps, or further analysis.

Final Tips for Accurate Geocoding
✅ Use full, standardized address formats (avoid abbreviations).
✅ Include the country field for global data.
✅ Watch for errors or missing results; some addresses may need manual review.
✅ Always double-check coordinate accuracy before analysis.
Wrapping Up
Geocoding addresses in QGIS is a practical, accessible way to unlock the spatial dimension of your data. Whether you’re mapping customer locations, service points, or survey results, this workflow gives you the foundation to turn text into maps—and insights.
Stay tuned for upcoming posts where we’ll cover visualizing geocoded data, spatial analysis techniques, and publishing maps online.